Appearance
mysql 安装步骤
下载并安装
- 下载官方的 yum 版本(5.7.10)
shell
# 下载
wget -i -c http://dev.mysql.com/get/mysql57-community-release-el7-10.noarch.rpm

# yum安装
yum -y install mysql57-community-release-el7-10.noarch.rpm- 安装 mysql
shell
yum -y install mysql-community-servermysql 启动
shell
# 启动
systemctl start  mysqld.service

# 查看状态
systemctl status mysqld.service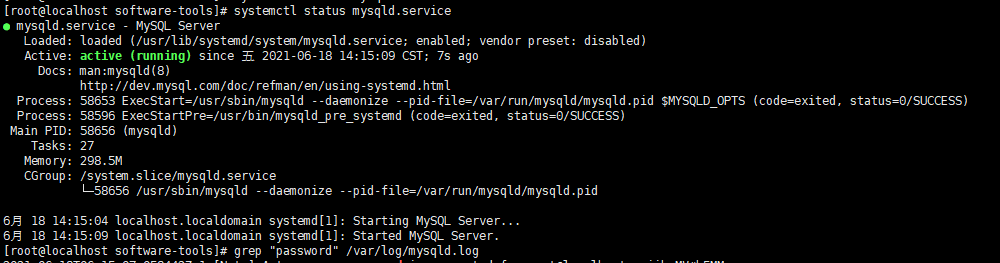
mysql 设置
- 查找 root 的默认密码
shell
grep "password" /var/log/mysqld.log
- 登录 mysql
shell
# 用root账号登录
mysql -uroot -p

# 输入上一步的密码- 修改默认密码
此时不能做任何事情,因为 MySQL 默认必须修改密码之后才能操作数据库,如下命令修改密码:
shell
ALTER USER 'root'@'localhost' IDENTIFIED BY 'new password';如果出现如下错误:

是以为密码的复杂度不符合默认规定,如下命令查看 mysql 默认密码复杂度:
shell
SHOW VARIABLES LIKE 'validate_password%';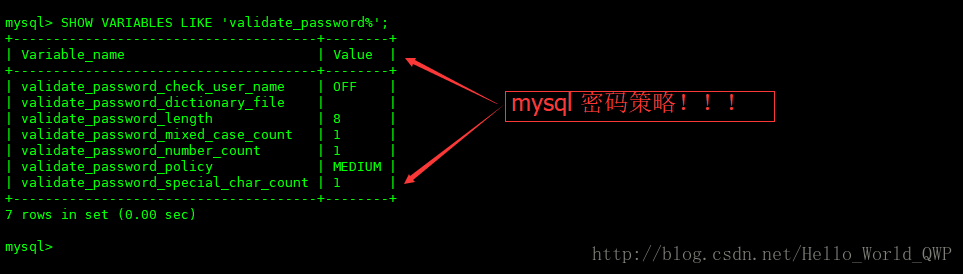
如需修改密码复杂度参考如下命令:
shell
set global validate_password_policy=LOW;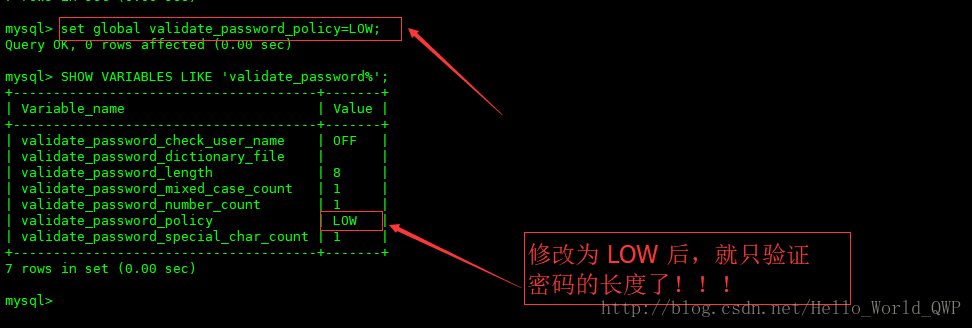
shell
set global validate_password_length=6;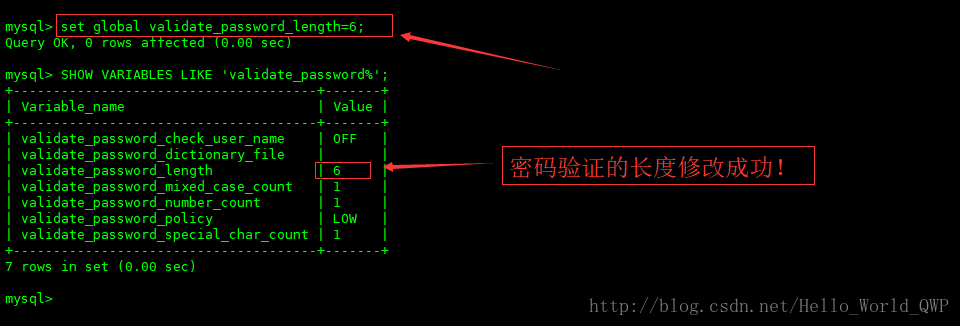
- 开启远程访问
执行以下命令开启远程访问限制(注意:下面命令开启的 IP 是 192.168.19.128,如要开启所有的,用%代替 IP):
grant all privileges on *.* to 'root'@'192.168.0.1' identified by 'password' with grant option;注:password--是你设置你的 mysql 远程登录密码。
然后再输入下面两行命令
mysql> flush privileges;